Showing posts with label Bouquet Bunch. Show all posts

Saturday, 29 June 2019

Beautiful Bouquet meets Bouquet Bunch

Well Jenny's big day has arrived.

From 5:00pm tonight all our children will be married, she's so excited and so are her daughters, who are going to be bridesmaids.

It's 8.30 now and I'm enjoying my last few minutes of tranquility before they all arrive to get ready!

As for the card I went for simple and stylish. There's a lot of my old stash in this one.


I was inspired by a card made by Lou Katzelman

To recreate this card follow the guide below:
® = retired, (sab) = Sale-A-Bration, (H) = Hostess, (nsu) = not stampin’ up, (ss) = Stamp set, (DSP) = designer series paper, (CS) = Card Stock

Start with  a card base of Whisper White (cs) 17.5 x 25 cm scored at 12.5 cm
(my base card is (nsu)
Bride ® (dsp) measuring 12.3 x 17 cm
Silver Foil measuring 7 x 7 cm
Window sheet measuring 7 x 7 cm
Gorgeous Grape (cs) measuring 3.5 cm x 16.5 cm
Whisper White (cs) measuring 3.5 x 11.5 cm
Sahara Sand (cs) measuring 7 x 9.5 cm
  • Make a window in the Bride ®  (DSP) using the 2 largest square shapes from the Stitched Shaped framelits 
  • Place the (DSP) on top of the base card and using a light pencil, mark out the square on the base card
  • Stamp the sentiment from the Beautiful Bouquet (ss) in Basic Grey inside the marked square then remove the pencil mark
  • Stick the piece of Window Sheet at the back of the Bride (DSP) using Tear and Tape
  • Adhere Foam Adhesive Strips around the window and along the edges of the (DSP) 
  • Remove the backing from the strips at the bottom of the card and the bottom 3 sides of the square  but not the top of the square or card to the base card
  • Insert the sequins into the square then remove the rest of the backing  paper and adhere the rest of the card down
  • On the strip of Whisper White  Mr & Mrs from the Beautiful Bouquet (ss) in Basic Grey 
  • Die cut the Mr & Mrs Using the Bouquet Bunch framelits die then die cut 3 fern leaves in Silver Foil, 3 small flowers in Whisper White, 4 small flowers in Gorgeous Grape, 1 larger flower in Gorgeous Grape and the stems in Sahara Sand
  • Wind the metallic thread round the stems attaching the Mr & Mrs label and adhere to the card using liquid glue
  • Add the 3 ferns, then the 3 white flowers, then the 4 small purple flowers also with liquid glue then larger flower in the middle using small dimensional pads and adding the Rhinestones as the flower centres. (Instead of rhinestones I used some small beads  I have in my stash.
Will be back with more cards soon
Annette X

Saturday, 25 August 2018

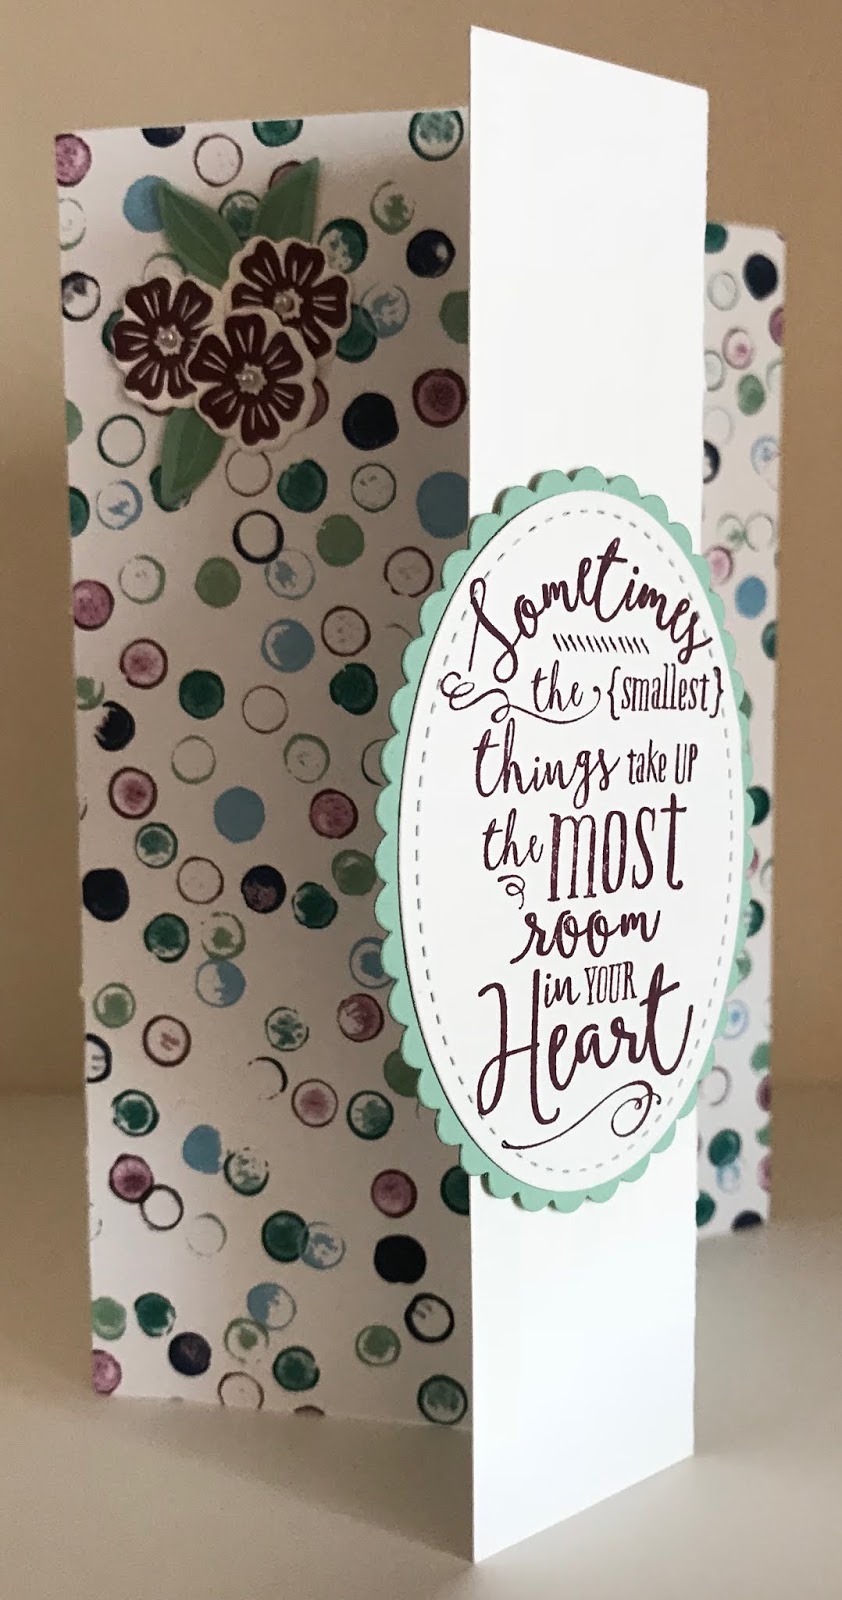
Z Fold Fridge Magnet Card

Today's card is based on one I saw on one of the blogs I troll each day and can't remember who's it was (Sorry). I love this sentiment from the "Layering Love" stamp set and thought it would make a lovely fridge magnet but never got round to using it until now (sorry it's retired) but here goes on how i made it.

Card base is a Z fold with a centre fold and then a 1¼” fold back for the front.

The sentiment is stamped using “layering love” and an oval stitched shape followed by a scalloped layering oval. 

The flowers and leaves are stamped from the “beautiful bouquet” and die cut using the “bouquet bunch” framelits. 

The close mechanism is formed using magnets, which in turn means the sentiment can be a fridge magnet afterward. 

Basic pearls were added to the centre of each of the flowers.

Hope you enjoyed today's card!

closed open

The materials used are:
® = retired, (sab) = Sale-A-Bration (nsu) = not stampin’ up

Stamps: Beautiful Bouquet, Layering Love ® Colours: Mint Macaron, Whisper White DSP: Tranquil Textures  Framelits:  Bouquet Bunch, Layering Ovals, Stitched Shapes Accessories: Basic Pearls, Magnets (nsu)

Will be back again soon with more cards

Love Annette x

Saturday, 2 June 2018

Beautiful Bouquet Birthday

It's Here

The longed for 2018 - 2019 Annual Catalogue

And there's so much to choose from, so if you don't have yours yet go make yourself a cuppa, come back, relax and click on the link opposite.

Then Enjoy!!!


I picked a card made with products mostly from the old catalogue which have carried over into the new one (yeah!!). The only thing no longer available is the Epoxy Shapes, but there are plenty of alternatives. The relationship sentiment isn't a Stampin' Up! product.

I like clean and simple cards as a rule so when I saw a variation of this on Pinterest I took a mental note and this is what I came up with.


The materials used are:
® = retired, (sab) = Sale-A-Bration (nsu) = not stampin’ up

Card stock: Tranquil Tide, Whisper White 
Ink: Tranquil Tide
Stamp sets: Beautiful Bouquet
Embossing folders: Softly Falling
Framelits: Bouquet Bunch, Stitched Shapes
Accessories: Glitter & Clear Epoxy Shapes

Inspired by: Papercraft Skies

Will be back again soon with more cards

Love Annette x