Showing posts with label Rhinestones. Show all posts

Monday, 17 June 2019

Beautiful You meets Swirly Frames

Quick 'n' simple, Well I took a card created by Amanda Charlesworth and used different colours to use up some of my retired stash then jazzed it up with some ribbon and sparkle.


To recreate this card follow the guide below:
(r) = retired, (sab) = Sale-A-Bration, (h) = Hostess, (nsu) = not stampin’ up, (ss) = Stamp set, (dsp) = designer series paper, (cs) = Card Stock

You will need:

Whisper White card base 10.5 x 29.7 cm scored at 14.85 cm.
Falling in Love (r) (dsp) measuring 11.5 x 8 cm.
Silver Foil measuring 11 x 7.5 cm.
Whisper White measuring 11 x 7.5 cm.
Beautiful You (ss) and Swirly Frames (ss).
Soft Sky ink (r), VersaMark.
Seam Binding (r) ribbon.
Aqua Painter, Stamparatus, Pinewood Planks embossing folder, Silver embossing powder, basic Rhinestones.

Emboss the front of the base card using the Pinewood Planks folder.
Adhere the silver foil to the dsp using liquid glue.
Cut a 4' strip of the ribbon, fold in half and cut a banner shape at each end and adhere towards the bottom of the silver foil.
Adhere this to the base card at a slight angle.
Prep the piece of whisper white (cs) using an embossing buddy and stamp the lady, rectangle frame and sentiment using versamark and heat emboss with silver powder.
Add a wash of colour using Soft Sky across the dress and hat.
Trim round the edge of the frame, add dimensionals to the back and adhere to the card.
Finish off with a few Rhinestones.

Will be back again soon with more cards

Annette X

Tuesday, 7 May 2019

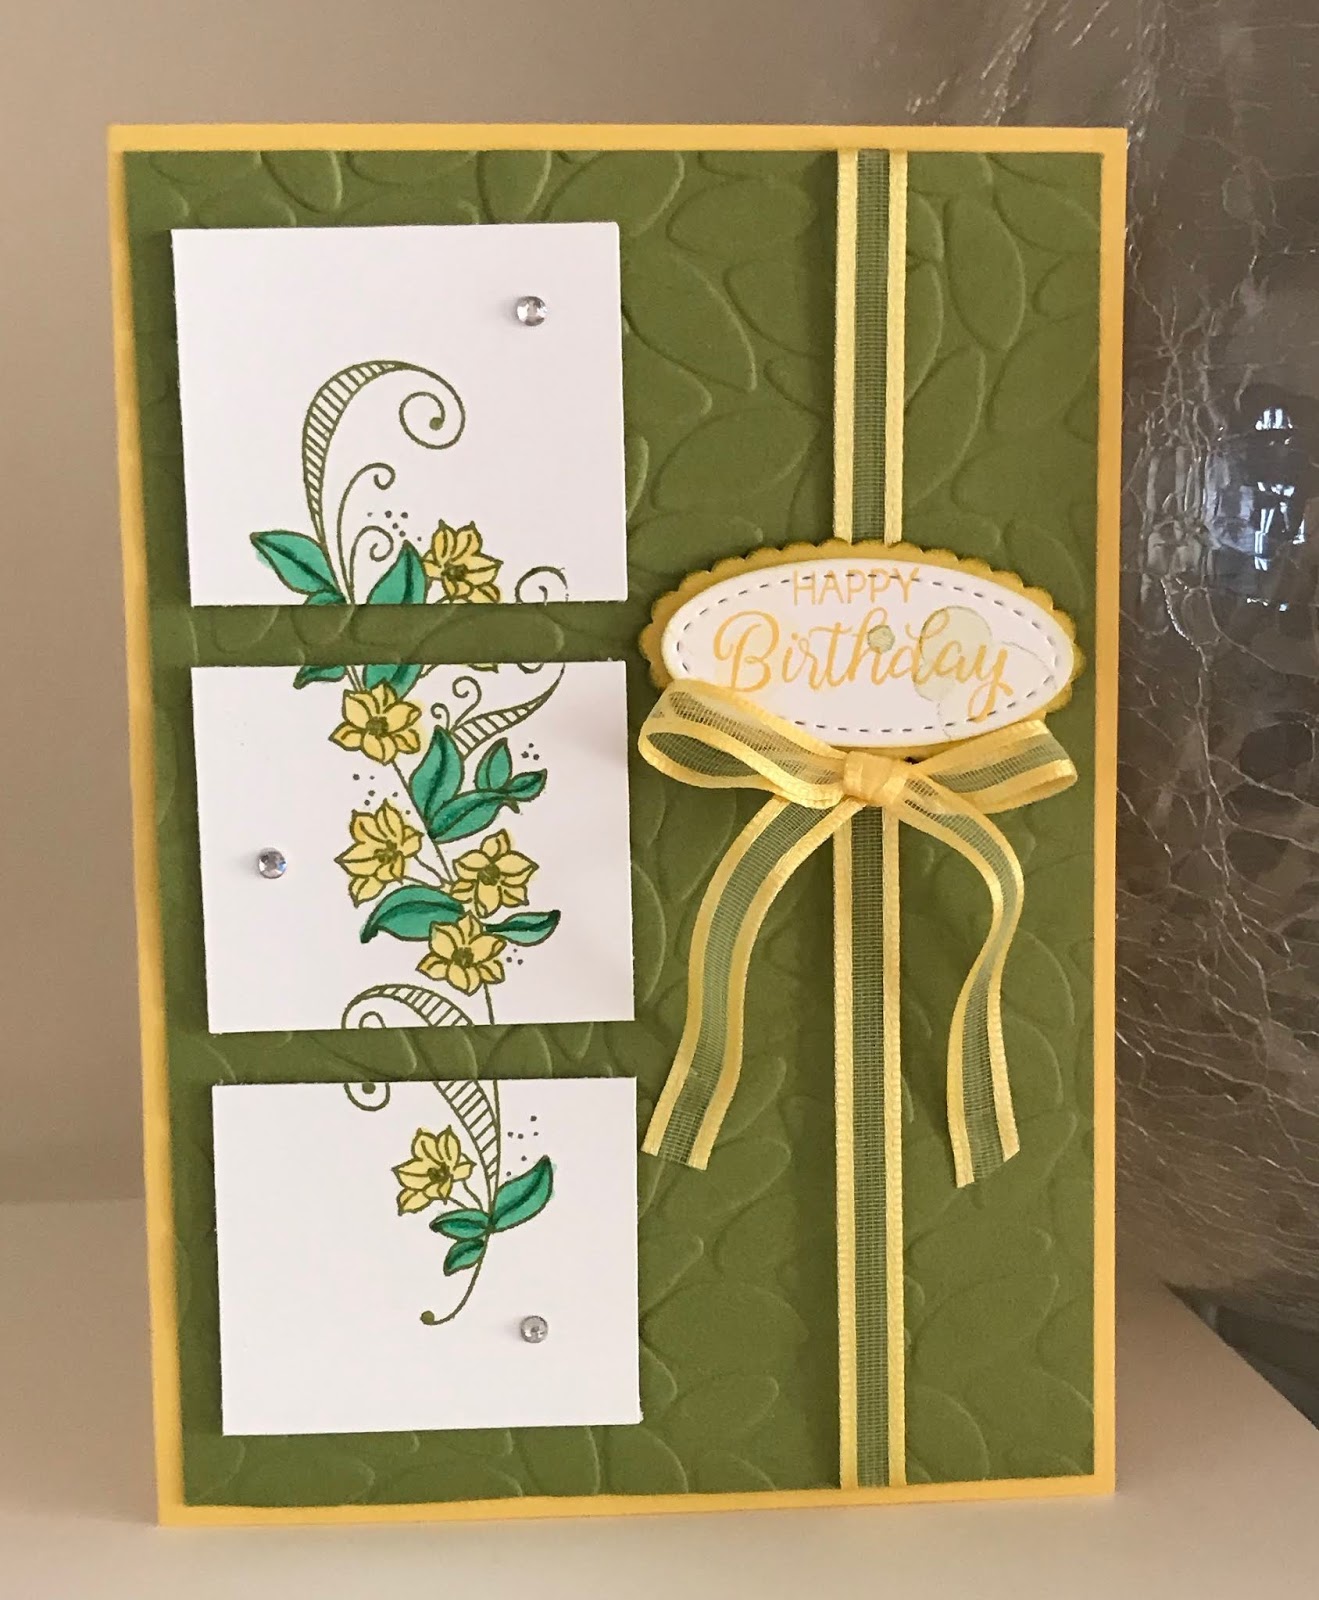
Beautiful Bouquet meets Beauty Abounds

Hi All, 

Well it looks like spring is on the way, it's a little warmer here in the West Midlands.


To recreate this card follow the  guide below:
® = retired, (cs) = card stock, (ss) = Stamp Set,(dsp) = Designer Series Paper

Start with a base card of Daffodil Delight measuring 14.8 x 21 cm scored at 10.5. 

Then a layer of  Old Olive (cs) measuring 10 x 14.3 cm, this is embossed using the Petal Burst folder.

On a piece of Whisper White (cs) measuring 12 x 4.5 cm and using the Beauty Abounds (ss) stamp the flowers in Old Olive.

Colour the flowers and leaves using Daffodil Delight and Call Me Clover Stamping'  Blends.

Now cut the flowers into 3 equal sections (each 4cm) adhere to the Old Olive layer using dimensional pads.

Adhere a strip of Daffodil Delight Organdy ribbon down the right hand side of the card using glue dots.

On Whisper White (cs) stamp the Happy Birthday from the Beautiful Bouquet (ss) in Daffodil Delight, then using the smaller of the group of circles in the Beauty Abounds (ss) stamp over the Happy Birthday (stamping off once first) in Daffodil Delight and Old Olive.

Die cut  the Happy Birthday using the smallest of the ovals from the Stitched Shapes Framelits and at the same time die cut the Smallest Scalloped Oval in Daffodil Delight from the Layering Ovals framelits.

Adhere the Happy Birthday sentiment to the scalloped oval using liquid glue. Then adhere this to the Old Olive card using dimensional pads.

Make a long tailed bow and adhere below the sentiment using glue dots.

Add some Rhinestones randomly down the flowers!!!

Will be back again soon with some more cards


Annette X

Tuesday, 30 April 2019

Beautiful You meets Heart & Stars

Well today I have two posts for you as I have two birthdays today, the first being my beautiful Granddaughter.

This card is based on one I saw ages ago on Pinterest but I can't remember who originally made it (sorry).


To recreate this card follow the guide below:
(r) = retired, (sab) = Sale-A-Bration, (h) = Hostess, (nsu) = not stampin’ up, (ss) = Stamp set, (dsp) = designer series paper, (cs) = Card Stock

Start with a base card of Whisper White measuring 21 x 14.5 cm and score at 10.5 cm
The next layer is Night of Navy measuring 10.25 x 14.25 cm. Adhered using liquid glue.
The next layer is Flirty Flamingo measuring 10 x 14 cm. This is sponged using the Hearts & Stars decorative masks in Flirty Flamingo ink, once sponged emboss using the Subtle folder and again adhered to the card using liquid glue.
On a piece of Thick Whisper White stamp one of the images from the Beautiful You (ss) using Memento tuxedo black ink.
On a piece of normal Whisper White stamp a sentiment from the same (ss) using Night of Navy ink.
Die cut both these images using the Stitched Shapes framelits and at the same time die cut a scalloped oval from the Layering Ovals framelits in Flirty Flamingo to use as a border for the sentiment. I sponged the edges of the scalloped oval in Flirty Flamingo for added dimension.
Attach the sentiment to the scalloped oval using dimensional pads. Now attach to the card, again using dimensional pads.
use Stampin' Blends to colour in the lady.
The ribbon behind the picture is a combination of retired Stitched Satin and Polka Dot Tulle, I used Snail tape to adhere the ribbon to the back of picture and then dimensional pads to attach the card.
To add a little dimension to the lady add some Wink of Stella along the black lines of the dress and hat.
To finish off I added some Rhinestones to the centre of each of the hearts and above the i on the sentiment which hides the dot.

Will be back again soon with more cards!!

Love Annette x

Wednesday, 13 March 2019

Springtime Impressions meets Perennial Birthday!

I made this for my Niece who normally I don't send cards to but, this year I just thought why not. I love making them and I hope she enjoyed receiving it yesterday. Happy Birthday for yesterday Gemma!!! Won't give your age away just yet.

Without realising it, I created this card following the lines of one I did a few weeks ago for my friends birthday last week,  and it's amazing how different this one looks compared it, it's three posts back and was posted on the 4th March.

What do you think of the difference?


To recreate this card follow the guide below:
(r) = retired, (cs) = card stock, (ss) = Stamp Set

Base card measures 14.5 x 21cm scored at 10.5cm
First layer CS measures 10 x 14cm and embossed using the Big Shot Embossing Mats and the Springtime Impressions thinlits. Adhere to the base card using liquid glue.
Stamp the birthday from the Perennial Birthday (ss) you need to put sellotape across the happy part of this stamp while inking up the stamp  and remove the sellotape before actually stamping.  Punch it out using the Classic Label punch.
Greeting x 2 measures 8.5 x 4cm each and needs to be backed with some Multipurpose Adhesive sheet.
Die cut the happy from the Merry Christmas thinlits once and at the same time die cut the small sprig of berries from the Frosted Bouquet framelits
Now die cut the second happy and at the same time die cut the fancier of the 2 circles from the Stitched Labels framelits, using Whisper White (cs).
Adhere this circle to the back of a Lacy Doily (r) using a dimensional pad.
For the happy birthday, remove the adhesive sheet backing from the colour want to have on the top and carefully lay it down forming a shadow on top of the one you want underneath and press down. Now remove the adhesive sheet from the underneath one and again adhere down on top of the Lacy Doily.
Place the Lacy Doily where you want it to go (but do not adhere it down) now place the sprig of berries where you want them to go and adhere them down using a very small amount of liquid glue.
Adhere the Lacy Doily using dimensional pads.
Use dimensional pads to adhere down the birthday greeting.
Create a bow using the black Satin Ribbon and adhere using a glue dot. To finish it off add some black Rhinestones (r).

Will be back again soon with more cards
Annette X