Showing posts with label stampin' blends. Show all posts

Monday, 5 August 2019

Lilypad Lake meets Perennial Birthday

Lilypad Lake meets Perennial Birthday

Well Perennial Birthday seems to be my go to stamp set for birthdays at the moment. Especially for male cards.

These two cards are the same except for the Enjoy sentiment, I couldn't decide which one to use so did one of each. I'm veering towards the red on white, which do you prefer?
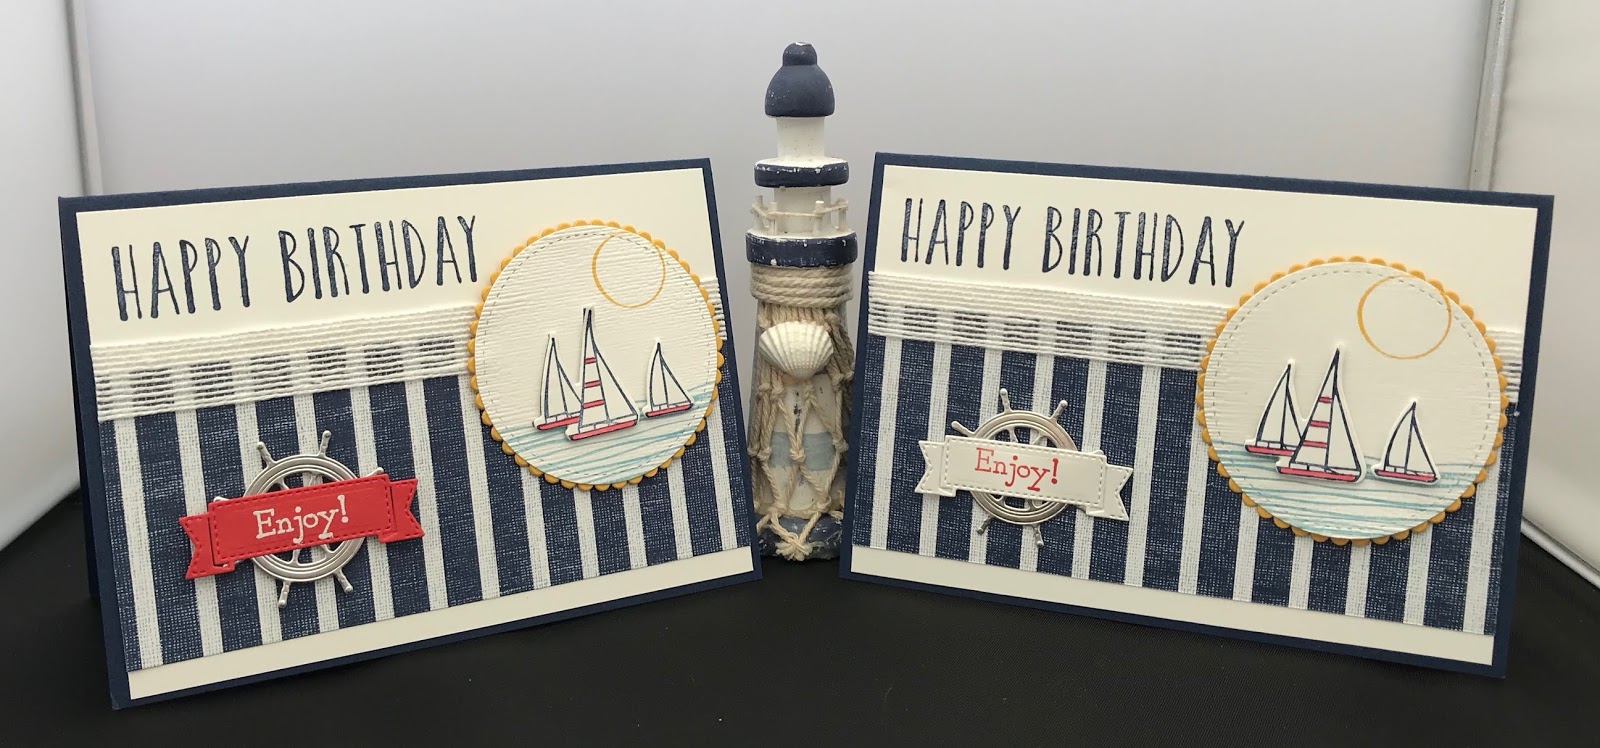


It's quite an easy card to make (I don't do hard cards) ha ha!!

To recreate this card follow the guide below:
® = retired, (sab) = Sale-A-Bration, (H) = Hostess, (nsu) = not stampin’ up, (ss) = Stamp set, (DSP) = designer series paper, (CS) = Card Stock,
when working with layering dies I start with the largest and work down (ie: the largest is number 1 and the smallest 4).

Card Stock and measurements: (Centimetres)
Night of Navy: 21 x 14.5scored at 10.5
Whisper White: 4 pieces, 14.3 x 10, 4.5 x 3.5, 5.5 x 2, 6.5 x 6.5
Crushed Curry: 7 x7
Silver Foil: 4 x 4
Come Sail Away DSP: 14.3 x 6
Flax Ribbon: 14.3
Embossing Folders: Subtle
Dies: Layering Circles, Lakeside, Smooth Sailing,  Stitched Shapes
Stamp Sets: Bella & Friends ®, Lilypad Lake, Perennial Birthday, Sailing Home
Stampin' Blends: Poppy Parade
Stampin' Pads: Balmy Blue, Crushed Curry, Night of Navy, Poppy Parade

Stamp the happy birthday in the top left corner of the Whisper White layer in Night of Navy.
Adhere the DSP about 0.5 from the bottom of the same layer using liquid glue.
Add the ribbon at the top of the DSP half on half off, and adhere using tear n tape.
On the square of Whisper White,  stamp the waves at the bottom, then the yachts (don't worry about the overlay) and lastly the sun towards the top (make sure it's not too high up.
On the smallest piece of Whisper White stamp the Enjoy sentiment in Poppy Parade.
On the last piece of Whisper White stamp the yachts again in Night of Navy.
Now colour in the sails using the blends.
Place all items to be die cut on your plate together. Silver Ships Wheel, Crushed Curry scalloped circle No:4, yacht scene Stitched Shapes circle No: 2, banner, separate group of yachts.
Adhere the yacht scene to the scalloped circle using liquid glue then attach to the base card using dimensional pads.
Overlay the yachts using dimensional pads.
Adhere the banner to the Helm using liquid glue and attach to the base card using dimensional pads.
Will be back again soon with more cards!!
Annette X

Tuesday, 30 April 2019

Beautiful You meets Heart & Stars

Well today I have two posts for you as I have two birthdays today, the first being my beautiful Granddaughter.

This card is based on one I saw ages ago on Pinterest but I can't remember who originally made it (sorry).


To recreate this card follow the guide below:
(r) = retired, (sab) = Sale-A-Bration, (h) = Hostess, (nsu) = not stampin’ up, (ss) = Stamp set, (dsp) = designer series paper, (cs) = Card Stock

Start with a base card of Whisper White measuring 21 x 14.5 cm and score at 10.5 cm
The next layer is Night of Navy measuring 10.25 x 14.25 cm. Adhered using liquid glue.
The next layer is Flirty Flamingo measuring 10 x 14 cm. This is sponged using the Hearts & Stars decorative masks in Flirty Flamingo ink, once sponged emboss using the Subtle folder and again adhered to the card using liquid glue.
On a piece of Thick Whisper White stamp one of the images from the Beautiful You (ss) using Memento tuxedo black ink.
On a piece of normal Whisper White stamp a sentiment from the same (ss) using Night of Navy ink.
Die cut both these images using the Stitched Shapes framelits and at the same time die cut a scalloped oval from the Layering Ovals framelits in Flirty Flamingo to use as a border for the sentiment. I sponged the edges of the scalloped oval in Flirty Flamingo for added dimension.
Attach the sentiment to the scalloped oval using dimensional pads. Now attach to the card, again using dimensional pads.
use Stampin' Blends to colour in the lady.
The ribbon behind the picture is a combination of retired Stitched Satin and Polka Dot Tulle, I used Snail tape to adhere the ribbon to the back of picture and then dimensional pads to attach the card.
To add a little dimension to the lady add some Wink of Stella along the black lines of the dress and hat.
To finish off I added some Rhinestones to the centre of each of the hearts and above the i on the sentiment which hides the dot.

Will be back again soon with more cards!!

Love Annette x

Friday, 26 April 2019

Pinewood Planks meets Fable Friends

Hello folks, well this was a card on the hop, I'd forgot to do my Aunt an Easter card, so when mine arrived it was a quick dash to the craft haven and this is what came out of it.


To recreate this card follow the guide below:
(r) = retired, (sab) = Sale-A-Bration, (h) = Hostess, (nsu) = not stampin’ up, (ss) = Stamp set, (dsp) = designer series paper, (cs) = Card Stock


Start with a card base of Crumb cake (cs) measuring 14.5 x 21 cm and score at 10.5 cm.
Adhere a strip of (dsp) (I used Botanical Gazette (r)) across the bottom of the base card measuring 10.5 x 3 cm.
Next using Crumb Cake (cs) measuring 10.5 x 12 cm emboss using the Pinewood Planks folder and add a faux bow across the bottom of this layer, mine is Taffeta So Saffron (r). Add this layer to the top of the base card.
Place a Pearlised Doily towards the top of this layer using a glue dot in the middle.
Now using a piece of Whisper White (cs) measuring at least 6 x 12.5 cm and Memento Tuxedo Black ink, stamp the Bunny and the Easter greetings sentiment from the Fable Friends (ss) leaving room to die cut them both later. Then colour in the Bunny using the light and dark Crumb Cake, light and dark Daffodil Delight, Light Flirty Flamingo, and light Poppy Parade Stampin' Blends To add the grass at the bottom use the stamp from the A Little Wild (ss)  using Call Me Clover ink.
With the Layering Ovals framelits die cut the bunny and sentiment, while at the same time die cut the two corresponding scalloped ovals In So Saffron (cs) the smaller one can be die cut from within the larger one.
Use dimensional pads to adhere the ovals together and then to the base card.

Will be back again soon with more cards

Annette X

Saturday, 27 October 2018

Happy 18th

Today's card is one I did some time ago for my Granddaughter's 18th. The base card is (nsu) the first layer and starburst circle are both done with the scoreboard. The sunburst is die cut using the vellum. The happy is die cut using dazzling diamonds glimmer and coloured with highland heather blends as is the grand daughter and 18th (nsu). The card was finished off with an organza bow and enamel shapes.

Sorry this card is mostly made with retired products, but I liked it and was pleased with the finish, hope you like it too!!! 


The materials used are:
® = retired, (sab) = Sale-A-Bration (nsu) = not stampin’ up

Card stock: Dazzling Diamonds Glimmer, Vellum, Whisper White, Stampin’ Blends: Wisteria Wonder ®, Thinlits: Hello You ®,Sunburst ®, Punches: Starburst, Ribbon: White Organza, Accessories: Metallic Enamel Shapes, Scoreboard

Will be back again soon with more cards

Love Annette x